
How to Flood-Proof a House
A Step-by-Step Guide to Protecting a Home Before the Water Arrives One inch of water inside an average home can cost more than $25,000 to repair, according to FEMA. That is drywall, flooring, insulation, and whatever was sitting on the floor when the water came in. Most of that damage is preventable. Flood-proofing a house is a set of ordinary decisions made ahead of time: where the water goes when it leaves your roof, which openings it finds first, what sits below the flood line, and what you can put in place when a warning comes through. This guide walks…
A Step-by-Step Guide to Protecting a Home Before the Water Arrives
One inch of water inside an average home can cost more than $25,000 to repair, according to FEMA. That is drywall, flooring, insulation, and whatever was sitting on the floor when the water came in.
Most of that damage is preventable. Flood-proofing a house is a set of ordinary decisions made ahead of time: where the water goes when it leaves your roof, which openings it finds first, what sits below the flood line, and what you can put in place when a warning comes through.
This guide walks through the work in order, from the free hour you spend looking at a flood map to the barriers you stage in the garage before a storm.
Two Ways to Flood-Proof a House
Flood-proofing falls into two approaches, and most homes use a mix of both.
- Dry floodproofing keeps water out. Sealed openings, barriers at doors and garages, waterproof coatings, and grading that pushes water away from the structure.
- Wet floodproofing lets water pass through the parts of a building it cannot damage. Flood vents in a crawlspace, elevated mechanicals, and materials below the flood line that dry out instead of falling apart.
Dry methods work well up to a few feet of water. Above that, water pressure against a foundation wall becomes the bigger problem, and letting water in and out on purpose protects the structure better than fighting it.
Step 1: Find Out How Your Property Floods
Before buying anything, learn what you are protecting against.
- Look up your address on the FEMA Flood Map Service Center to see your flood zone and Base Flood Elevation.
- Ask a surveyor for an elevation certificate if you do not have one. It tells you how your lowest floor sits relative to the expected flood level, and it affects insurance rates.
- Walk the property during the next heavy rain. Watch where water pools, which direction it runs, and how close it gets to the foundation. This tells you more than any map.
- Ask neighbors who have been there longer. They remember the last bad year.
Flooding is not limited to high-risk zones. FEMA reports that most U.S. counties have experienced a flood, and more than a fifth of flood claims come from properties outside high-risk areas.
Step 2: Move Water Away From the Foundation
Most basement water starts as roof runoff that never got directed anywhere.
- Grade the soil so it drops about six inches over the first ten feet away from the house.
- Extend downspouts four to six feet from the foundation, farther if the ground is flat.
- Clean gutters twice a year. A clogged gutter dumps the entire roof against one corner of the house.
- Add a French drain or swale where water consistently collects.
- Check that the driveway slopes away from the garage rather than toward it.
None of this is expensive. It handles the routine flooding that fills basements every spring.
Step 3: Seal the Openings
Water gets in through doors, garage openings, basement windows, and utility penetrations. These are the places where barriers pay for themselves.
- Garage doors. The widest and lowest opening on most homes. The TrapBag® Aluminum Plank System mounts side channels permanently and stacks planks into place when a storm is coming. Water-Filled Barriers line up across the opening and hold back up to 16 inches of water.
- Entry doors. Threshold seals, door sweeps, and plank barriers at exterior doors that sit near grade.
- Basement windows and window wells. Clear covers and drains keep runoff from pouring straight into the basement.
- Wall penetrations. Seal around pipes, dryer vents, and conduit with hydraulic cement or waterproof sealant.
Sandbags work for one event. They arrive wet, contaminated, and expensive to dispose of. Reusable barriers go up faster and store flat for the next storm.
Step 4: Get Utilities and Mechanicals Off the Floor
Replacing a furnace costs more than raising it did.
- Elevate the furnace, water heater, and HVAC equipment onto platforms above the expected flood level, or relocate them to an upper floor.
- Raise the electrical panel, meter, and outlets above the flood line during any remodel.
- Anchor propane and fuel tanks so they cannot float or tip.
- Move anything irreplaceable out of the basement. Photos, documents, and inventory belong upstairs or in waterproof containers.
Step 5: Manage the Water That Does Get In
Assume some water arrives anyway and give it somewhere to go.
- Sump pump with battery backup. Floods take the power out. A pump without a backup is decoration.
- Sewer backflow valve. Stops municipal sewage from backing up into the basement when the system is overwhelmed.
- Flood vents. In a crawlspace or enclosed area below the Base Flood Elevation, FEMA sets a minimum of one square inch of net open area per square foot of enclosed space, with at least two openings on different walls, positioned within 12 inches of grade. Vents equalize pressure so foundation walls do not collapse under it.
Step 6: Choose Materials That Survive Getting Wet
Anything below the flood line should be replaceable or water-tolerant.
- Concrete, tile, or sealed masonry floors instead of carpet and wood
- Closed-cell foam insulation instead of fiberglass batts
- Pressure-treated lumber and cement board on lower walls
- Metal or plastic shelving rather than particleboard
Standard drywall wicks water upward and holds it. If a lower level has flooded before, plan on replacing that section with something that dries.
Step 7: Build a Storm-Season Routine
Preparation is a habit, not a purchase.
- Inspect barriers, seals, and pump operation at the start of each season
- Stage barriers where you can reach them in the dark
- Keep a written list of what gets deployed, in what order, and by whom
- Clear gutters and drains before the first forecast storm
- Photograph the house and its contents for insurance purposes
Step 8: Put Flood Insurance in Place Early
Standard homeowners policies do not cover flood damage. NFIP policies can take up to 30 days to take effect, so buying one the week a hurricane appears on the forecast will not help. Buy it in the off-season, and keep the elevation certificate on file, since it can lower the premium.
Where TrapBag Fits
TrapBag® Home Defense covers the openings part of the plan with two reusable systems:
- Aluminum Plank Flood Barrier System. Engineered per opening, with side channels mounted permanently and planks that stack in during a flood event. Built for garages, entry doors, and storefronts.
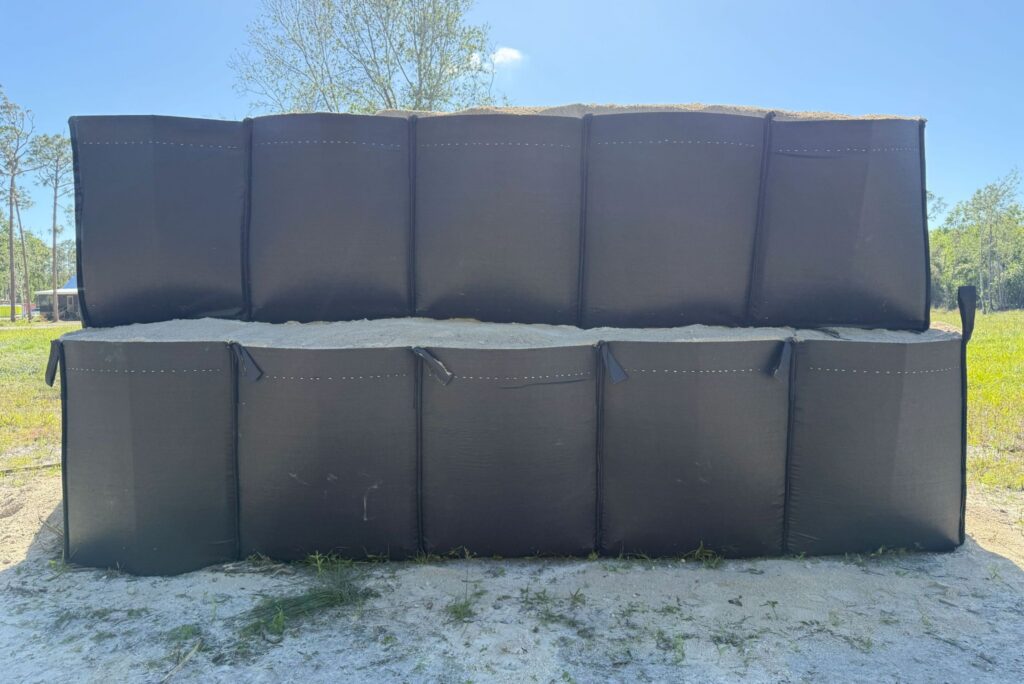
- Water-Filled Barriers. Modular 54-inch units that fill on site, connect end to end, and hold back up to 16 inches (0.4 m) of water in static or low-velocity conditions.
Both store flat, deploy in minutes, and redeploy season after season. For residential installations, TrapBag partners with Emerald Green for professional installation, seasonal removal, and pre-storm readiness.
The Short Version
If you do nothing else this season:
- Extend the downspouts and fix the grading
- Cover the garage door and any door near grade
- Raise the furnace, water heater, and panel
- Add a battery backup to the sump pump
- Buy the flood policy before you need it
Questions?
Not sure where your house is most exposed?
Contact our team to talk through opening dimensions, expected water height, and site conditions. We can help you figure out which barriers fit your property and how they work alongside the rest of your flood-proofing plan.
Frequently Asked Questions
Can you completely flood-proof a house?
Not entirely. Flood-proofing reduces damage rather than removing the possibility of it. A house with proper grading, sealed openings, elevated mechanicals, and a working sump pump can come through a moderate flood with little more than cleanup, while an unprepared house on the same street loses its lower level. Above three feet of water, the goal shifts from keeping water out to protecting the structure while it passes through.
How much does it cost to flood-proof a house?
It ranges widely. Grading, downspout extensions, and gutter work run a few hundred dollars. A sump pump with battery backup, sewer backflow valve, and flood vents fall in the low thousands. Reusable barriers for doors and garages depend on opening size and whether the installation is permanent. Set against $25,000 in damage from a single inch of water, most of these pay back in one event.
What is the difference between dry floodproofing and wet floodproofing?
Dry floodproofing keeps water outside the building using seals, barriers, and coatings. Wet floodproofing accepts that water will enter certain areas and prepares those areas to handle it with flood vents, elevated systems, and water-tolerant materials. Homes below the Base Flood Elevation usually need both.
Do I need flood protection if I am not in a flood zone?
Flood maps show where flooding is likeliest, not where it is possible. FEMA reports that more than 20 percent of flood claims come from properties outside high-risk areas. Flash flooding, failed storm drains, and heavy rain on saturated ground put water in basements well outside mapped zones.
What is the fastest way to protect a house before a storm?
Cover the openings. Water-Filled Barriers fill on site and line up across garage doors, entry doors, and walkout basements in minutes. Move valuables up, unplug and elevate what you can, and confirm the sump pump and its backup are working. Then clear the gutters and downspouts if there is time.
Are flood barriers better than sandbags?
For repeat use, yes. Sandbags need filling, hauling, and stacking, they leak at the seams, and afterward they are contaminated waste. Reusable barriers deploy faster, hold a straighter line, and store flat between events.
Will homeowners insurance cover flood damage?
No. Flood coverage comes through a separate NFIP policy or a private flood insurer. NFIP policies can take up to 30 days to take effect, so buy before storm season rather than during it.
How high can a home flood barrier hold water?
TrapBag Water-Filled Barriers hold back up to 16 inches (0.4 m) when installed correctly. The Aluminum Plank System is engineered per opening, so height depends on the width of the opening and the structural conditions around it. Both are built for static or low-velocity floodwater rather than fast-moving water or river diversion.
Contact Us
Tell Us About Your Project
We are happy to answer your questions and help you find the right setup for your situation. For immediate assistance, please call (239) 674-6611. We are available 24/7.
Get the Dirt Before the Flood Hits
Stay ahead of flooding, erosion, and disaster response challenges. The Dirt, TrapBag’s monthly newsletter, delivers field-tested tips, real-world case studies, and the latest in barrier technology straight to your inbox.